• Skip to primary navigation
  • Skip to main content
  • Skip to primary sidebar
  • Texas A&M Forest Service
  • Texas A&M Veterinary Medical Diagnostics Laboratory
  • Texas A&M AgriLife Extension Service
  • Texas A&M AgriLife Research
  • Texas A&M College of Agrculture and Life Sciences
Hunt County Master Gardeners
Hunt County Master GardenersTexas A&M AgriLife Extension Service
  • Menu
  • Home
  • Articles
  • About
    • Who We Are
    • Program Overview
    • FAQ
    • Contact
    • Master Gardener Emeritus
    • Heritage Garden
      • Animal Name Bed
      • Heritage Garden Plant Database
    • Hunt County Master Gardeners Shutterfly Photos
    • Junior Master Gardener Program
    • Outdoor Learning Center
  • Events
  • Links
    • Hunt County Extension Office
    • Texas AgriLife Extension Bookstore
    • Aggie Horticulture
    • Aggie Turf
    • Texas Master Gardener
    • Texas Master Gardener Association
    • Texas Master Gardener License Plates
  • Resources
    • Plants for East Texas
    • Vegetable Resources
    • Fruit & Nut Resources
    • Texas Plant Disease Diagnostic Lab
    • Soil, Water and Forage Testing Lab
    • Texas Superstar Plants
    • Earth-Kind Landscaping
    • Xeriscape
    • Insects in the City
    • USDA Plant Hardiness Map
  • CEUs
    • Log My Hours
    • Texas Master Gardener Association Events
    • Master Gardener Advanced Training
    • Earthkind Online Classes
    • Landscape Design Study Courses
    • American Horticultural Society Events
    • Texas Botanical Gardens and Arboreta

Planting Container Shrubs

October 27, 2014 by stephaniesuesansmith

Planting Container Shrubs by Wanda Loras

Right now is the best time to plant your container shrubs.  The weather is pleasingly warm during the day and the nights are cool and refreshing.  Just like humans, newly planted shrubs love this weather too.

September through December is the best planting time because you have 5- 7 months for the roots to grow and strengthen. You may think your shrubs are asleep during the winter months but a lot is happening under the covers.  Plant roots will grow as long as the soil temperature is 40 + degrees Fahrenheit. In North Central Texas the soil temperature does not get below 40 very often.  So when the blast of heat from our hot summer months envelope them they are strong and healthy enough to adapt.

Shrubs are an intricate part of the landscape.  They come in a multitude of shapes, sizes, and colors.  After you have decided where you want your shrubs the next step is planning.  Make note of the space available.

If you are adding shrubs, consider a different shape, color, or height.  Look at the label with the shrub.  Most will state the mature height and width.  If you have a four foot space and you buy a plant solely because you like the way it looks without factoring in the mature size you will not be happy.  My friend planted a Fraser’s Photinia in a four foot space because she liked the color.  When I told her how big this plant would be at maturity her comment to me was, “Oh well, I can keep it trimmed.”   At maturity a Fraser’s Photinia would look like a skeleton if kept to a 4 foot width!  Imagine all that trimming work as well.  That is why reading the label is one of the most important things you can do when selecting plants.  Most  labels will also inform you of  the spacing between plants, the lowest temperature the plant can withstand, the moisture conditions needed, and if the plant requires a sunny, partial shade, or shade location.  Some shrubs do not have a label with all these conditions available.  For this reason, find a reputable nursery with informed staff that can answer your questions.

When you plant, dig a hole wide enough for a six inch clearance all around (12” diameter root ball needs 24” dia. hole) and only as deep as the root ball (12” deep root ball needs 12” deep hole). The depth is important to insure the shrub does not sink into the hole due to settling.   The width is important because it keeps the roots from hitting a brick wall as soon as they want to travel.  They need loose soil to grow and expand.  Put a little loose soil in the bottom of the hole so the root ball is slightly higher than the surface.  When placing the shrub in the hole, pick it up from the bottom of the root ball and place it in the center of the hole and backfill half of the depth with composted native soil.  Tamp the soil down and slightly water to settle the soil.  Finish filling the hole with the composted soil to the ground surface.  Tamp the soil down and thoroughly soak the root ball and surrounding area.  The root ball should be slightly above the surface. Keep watered every 7-10 days.  Finish with 4 to 6 inches of mulch and wait for spring to fertilize.

If you choose the right shrub for the space you will have years of enjoyment with a minimal amount of trimming.  In fact, I have shrubs I never trim.  A little planning will save you many hours of labor and frustration.

Filed Under: Trees Tagged With: Container Shrubs,

Brown Patch

October 20, 2014 by stephaniesuesansmith

Brown Patch by Charles Bohmfalk

It is that time of the year when we are now entering the fall season that brings cooler weather and humid, rainy conditions.  These conditions when the overnight temperatures are below 70° F and the daytime temperatures are in the 75° F to 85° F range can lead to many problems in the lawn.  Brown patch is one of the lawn diseases that becomes a real problem in our lawns during the cooler and more humid weather conditions in the fall and early winter months.  A number of popular lawn grasses are susceptible to brown patch: Berumda, Carpetgrass, Centipede, Fescue, Kentucky bluegrass, St. Augustine and Zoysia.  Other grasses may be infected as well.  Brown patch may be identified as circular or irregular shaped patches of light brown, thinned grass.  The grass may appear yellowish and have a smoke ring on the outer edge.  Leaf sheaths become rotted and a gentle pull on the leaf blade will easily separate the leaf from the runner.   Most fungicides will do an effective job if used as a preventive treatment.  Brown patch may be harder to control once the fungus is established.  The Texas A&M website (aggieturf.tamu.edu/answers4you/disease/brownpatch.html) lists some of the more effective fungicides.  There are other fungal infections that may resemble brown patch.  The same fungicide may control that problem as well.

I recently had a brown area in my lawn.  Brown areas caused by grub worms will show a browning or the appearance of a lack of water in the area.  The damage may be a small spot or cover a large area and is caused by white grub worms, the larvae of the May or June bugs.  The larvae feed one to two inches below the surface and destroy part or most of the root system of the lawn.  Damage usually appears in late July through early August.  If the damage is heavy, the sod can be easily lifted up or rolled up.  To verify that the problem is grub worm damage, dig one square foot sections to a depth of 4 inches.  Treatment with an insecticide is necessary if more than four grubs are found per square foot.  Since my lawn damage was in an area where I have had a problem with grub worms before, I treated the area with an insecticide.  The grass is already showing good signs of recovery.  If left unattended in the fall, the grub worm will survive over winter and become very active in the early spring.  By this time, the grubs have done more significant damage to the grass roots and large areas of the lawn may not survive the winter.

Cinch bug damage appears as irregular patches in sunny areas, usually along driveways, sidewalks and house foundations.  The grass first turns yellow and eventually dies and turns brown.  To identify a chinch bug infestation, remove both ends of a metal can and twist it into the grass.  Fill the can with water and a little detergent.  In a few minutes, the chinch bugs will float to the surface.  They are black with white wings folded over the body.  Treat with an insecticide that has cinch bugs listed on the label.  Read the label and carefully follow the directions when using any fungicide or insecticide.

Filed Under: Plant Diseases, Turf Tagged With: Brown Patch,

Garlic

October 14, 2014 by stephaniesuesansmith

Garlic by Diana Sidebottom

Extra, Extra, Read All About It. This just in from the AP network. The clinical trial of a mouthwash containing 2.5% fresh garlic shows good antimicrobial activity for killing germs and bacteria, although the majority of the participants reported an unpleasant aftertaste and halitosis. Seriously? Garlic Mouthwash? I would like to know who funded that clinical trial to see if they have any extra money laying around for (the most ridiculous thing you can think of) trial because I’m going to sign up!

Garlic has been used as both food and medicine in many cultures for over 7 thousand years.  Its close relatives include the onion, shallot, leek, and chive. One of the best known, elephant garlic, is actually a wild leek. Garlic is hardy thru climate zones 4-9 and can be day length sensitive. There are two major subspecies, hard neck which is generally grown in cooler climates with shorter days and soft neck which prefers more equatorial temperatures and longer days.

Garlic has been domesticated for so long that it no longer produces a viable seed, so all garlic grown around the world is essentially a clone of the parent plant, known as vegetative reproduction. However, many hard neck varieties still “bolt”, which creates the emergence and eventual stiffening of garlic’s now impotent reproductive organ, the seed head (perhaps we could create GM garlic and cross it with some Cialis to help the poor little thing). Yes, it is called a scape. The thing that leaves all French chefs frothing at the mouth in spring.  A divine vegetable that we Americans have until recently thrown into the compost pile. Guilty as charged.

In zone 8, about the middle of October, plant individual cloves, 4 to 6 inches deep and approximately 6 inches apart in all directions in loose, well drained soils with a high organic material content in a sunny location. Garlic is not picky about pH levels. Garlic plants are usually very hardy and not bothered by many pests or diseases, the exception being nematodes and white rot disease.

In a few weeks your garlic will appear as if by magic and grow all winter. In the spring, if you are growing hard neck or elephant garlic, when those scapes shoot up, call moi, your new BFF, and I will pick them for you. You actually do need to remove them to focus all the garlic’s energy into bulb growth.

In May, when your garlic looks like it is dying, remember they are daylight sensitive and that is just what they do. It’s time to harvest! Get your pitch fork and dig up those beauties. If you wait until the tops die completely there is good news and bad news. The good news is you won’t have to plant garlic next year. Yes, they will stay there all summer and emerge on their own next fall. The bad news is you will lose, as in misplace, can’t find where you planted the bulbs once attached to those dying tops, thus you don’t reap your harvest. After you dig your beauties, leave the tops on and store in a cook dark dry spot. Soft neck garlic may be braided and hung for ease of storage. Select the largest bulbs to planting next year, unless you choose to purchase new every year. So start them out right and they will take care of themselves. Don’t you wish more things were like that? So as always, happy harvesting!

Filed Under: Herbs Tagged With: Vegetables

E-blast from the Master Gardeners for October

October 9, 2014 by stephaniesuesansmith

October 2014_Page_2 October 2014_Page_1

October 2014_Page_2

Filed Under: Events

Goblins in the Garden

September 26, 2014 by stephaniesuesansmith

Goblins in the Garden by Sara Allen

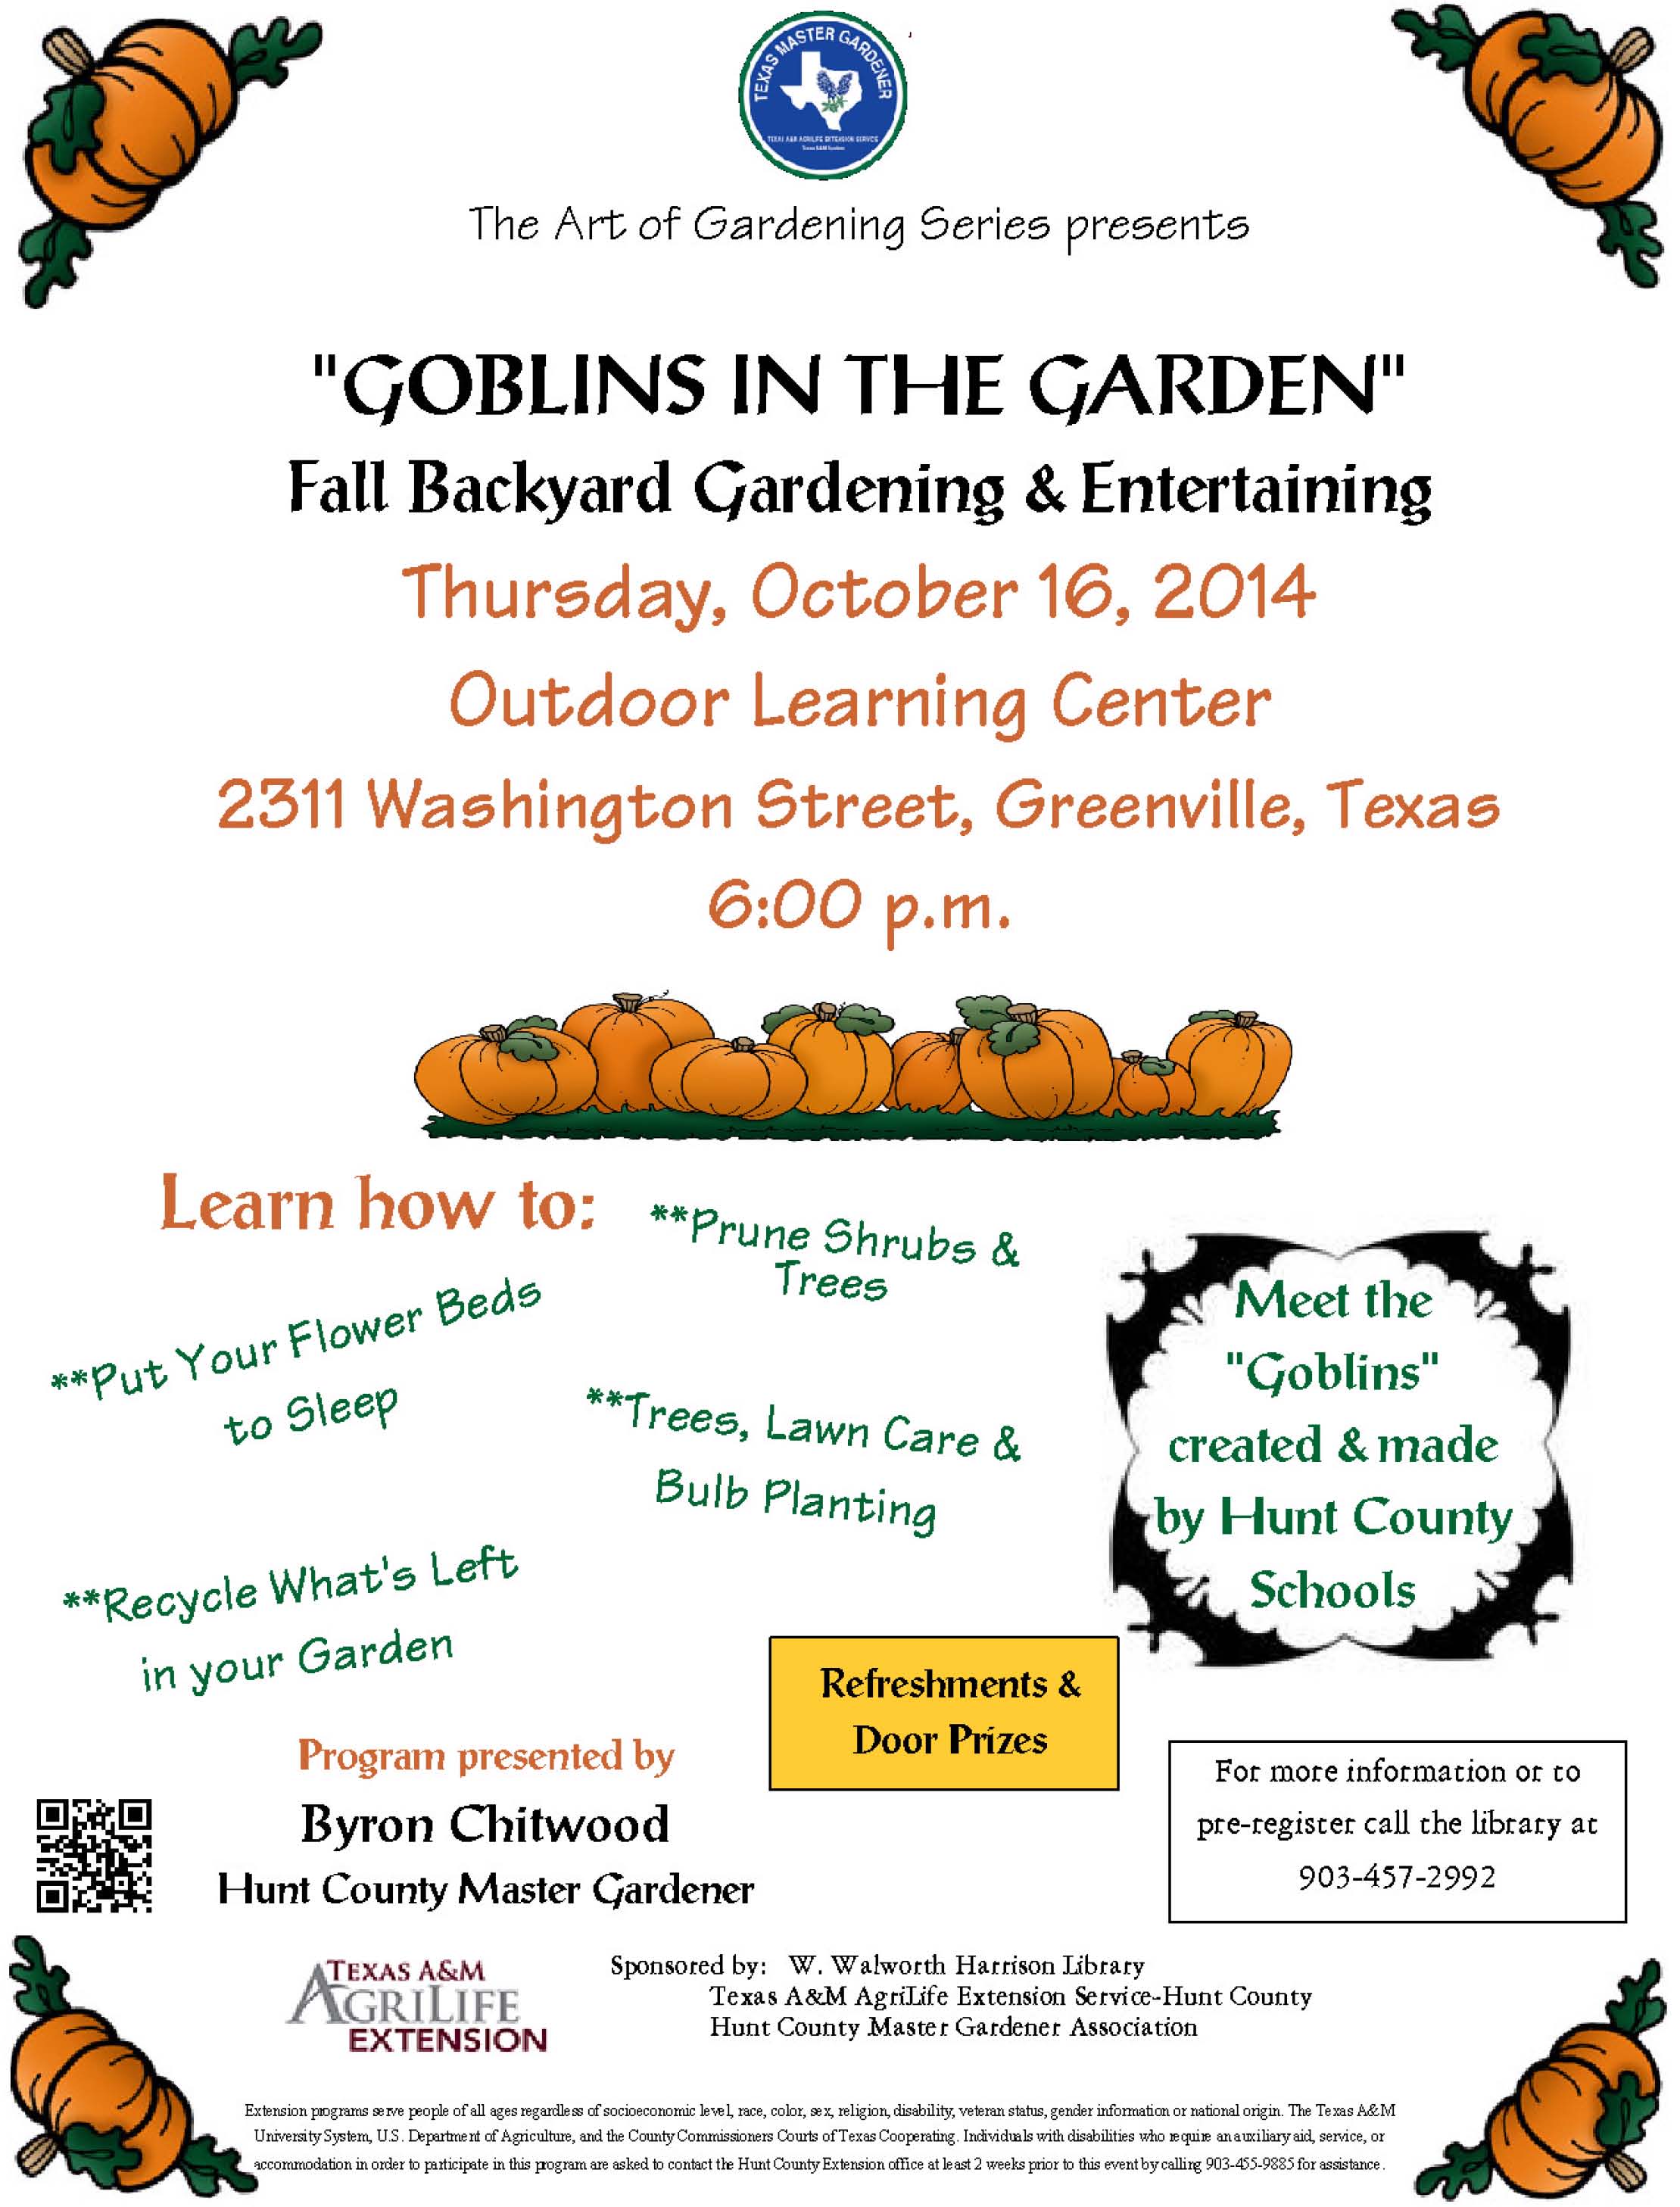
Hunt County Master Gardeners are pleased to announce the 2014 “Goblins in the Garden” Contest for schools and youth organizations in the county. This event is being conducted along with the fall Art of Gardening Seminar, to be held in October in the Heritage Garden of Hunt County.

The entry process for the Goblin contest is easy. Groups should create a “Garden Goblin” using a fall garden theme. This could include scarecrows, pumpkins, owls, cats, bats, etc. Goblins should be made from mostly recycled items. Ideas include plastic milk jugs, flower pots, coke cans, buckets, etc. Creativity is valued as part of the contest!

Goblins need to be weather-proof as much as possible, as they will be on display for the public in the Heritage Garden from October 11-31. Groups should name their goblin and attach an 8”x10” laminated sign to it for display which includes the goblin name, school or organization. One entry per school or organization is allowed. Call, text, or email Master Gardener Charle Fox, by Oct. 1st  to reserve a spot for your Goblin  in the Heritage Garden. Contact information is: 903-246-1802 or email at charledfox@gmail.com

Deliver your Goblin to the Heritage Garden, 2311 Washington St., Greenville on Friday October 10 from 3-5 p.m. or Saturday October 11 from 9-11 a.m.

Cash prizes will be awarded for 1st, 2nd and 3rd Place Winners.  A “People’s Choice Award” will also be given.

Filed Under: Events

Not Too Late for Fall Garden

September 26, 2014 by stephaniesuesansmith

Not Too Late for Fall Garden by Byron Chitwood

It is not too late to plant some of the vegetables in your fall garden.  Up until the last few days, the sun has been so hot that most vegetables that were planted at the earliest recommended planting date did not germinate properly if at all.  I suffered right along with the rest of you and in some cases, I have replanted at least twice.  The only ones that I planted that seemed to thrive were mustard greens.  These seemed to do fairly well and I am looking forward to harvesting some of the outer leaves in the next few days.  Collards did come up but have not done as well as the mustard greens.  Most of the time, collards will come up thickly in a row for a few feet and then there will be blank spaces where none germinated.  Just dig some from the areas where there are too many and immediately replant in the blank spots maintaining a spacing of ten to twelve inches between plants.

Some other vegetables that that can still be planted are lettuce, radishes, spinach, onions, collards, chard and beets.  Lettuce is one of the hardest plants to grow in this climate and soil conditions.  You plant lettuce seeds and pray for a rain.  It hardly ever rains for the type we pray for which is a nice gentle rain for several days in a row but pours down and compacts the top of the soil forming a crust which is tough for the lettuce plants to pierce.  Mix plenty of organic material in the soil before planting and that will certainly help some.  I can remember as a kid, some people planted lettuce in pure sand and kept it well watered to insure proper germination.  However in Oklahoma, they never bothered with planting a fall garden except for planting turnips.  We Okies never ate the greens although we always heard they were good and “some people south of the Red River ate them”!  We also never ate beet greens, collards or any other green other than cooked spinach.  Our mothers had to convince us that spinach was good for us because “look how strong Popeye became when he ate a can of spinach”.

If you can find some onion sets, plant them anytime but don’t expect them to bulb.  Just be content with the scallions that they produce.  They just keep growing as scallions until they are as large as leeks.  If you know somebody that has multiplying onions and has an oversupply, maybe they will give a few to you for replanting in your garden.  These are great and grow all winter long.  Just be sure and control them or you will have them all over the garden.  When they bloom, cut the blooms off and toss them in the trash.  At best, put them in the compost pile and keep them turned as deep under the surface as possible until they die.

The last thing that can be safely planted in the fall garden is radishes.  This can be done until November 1.  Maybe we won’t have an early freeze and you can enjoy some fall radishes.

The Hunt County Master Gardeners will be hosting the Art of Gardening series at the newly dedicated Outdoor Learning Center on Thursday, October 16.  The subjects will be on composting garlic.  Be sure and mark this date in your calendar.  We hope to see you there.

Filed Under: Uncategorized Tagged With: Vegetables

Goblins in the Garden

September 18, 2014 by stephaniesuesansmith

art of gardening flyer

Filed Under: Events

Cypress Trees

September 15, 2014 by stephaniesuesansmith

Cypress Trees by Charles Bohmfalk

There are several species of cypress trees that are found around Texas. The most common and well known is the bald cypress.  It is known by several names:  Gulf cypress, red cypress, southern cypress, swamp cypress, white cypress and yellow cypress.  Bald cypress is a member of the Redwood family.  They are native to swamps and rivers in east and central Texas. It can tolerate standing water or rather dry sites once established, but does best in wetter areas.  They prefer acid to neutral soils.  The bald cypress is a deciduous (loses its leaves in fall) conifer (cone bearing tree) that is widely planted in Texas as a shade tree.  They are among the first trees in Texas to lose their leaves in the fall (hence the name “bald cypress”) and the last to bud in the spring.  Bald cypress trees can grow to a height of up to 120 feet.  Most live up to 600 years, but some individuals have survived as long as 1,200 years.

Bald cypress trees provide habitat for many animal species. Wild turkey, wood ducks, evening grosbeak and squirrels eat the seeds. Branches provide nesting places for bald eagles and osprey. Rotting knees are used as nesting cavities by warblers. Catfish spawn beneath cypress logs. Bald cypress diffuse and slow floodwaters, reducing flood damage.  Cypress is also called the “wood eternal” because the heartwood is resistant to decay. Bald cypress is used for heavy construction, including docks, warehouses, boats and bridges, and was heavily logged in much of Texas. The Choctaw Indians used the bark for string and rope. The Seminoles found bald cypress useful for making houses, canoes, and ceremonial objects.

The Montezuma bald cypress is found from the Rio Grande River south to Guatemala; it is uncommon to rare in Texas. It is also known as: Mexican Cypress, Sabino, Ahuehuete, Cipres.  The main difference between Montezuma bald cypress and bald cypress is that Montezuma bald cypress is evergreen and the male flowers are borne in long racemes, whereas common bald cypress is deciduous and the male flowers are in short clusters. Since far south Texas is the northernmost of its range, it has difficulty surviving winters north of San Antonio.

Arizona Cypress (also known as Arizona Rough Cypress, Cedro, Cedro Blanco, Rough Bark Arizona Cypress) is native to Texas only in the Chisos Mountains of Big Bend National Park, but is widely cultivated as a specimen tree and for dense windbreaks in west Texas and the southern High Plains, and for erosion control in dry areas.  It is a medium to large evergreen tree with small scale-like green, blue-gray to silver-blue leaves. It is compact, drought tolerant and fast-growing.  It is adaptable to most areas of Texas.

The Italian Cypress is native to the lands surrounding the Mediterranean Sea in its eastern region. The Italian Cypress is cultivated throughout the United States in areas with similar hot, dry summers and mild, rainy winters as the Mediterranean Basin. The Italian Cypress has erect branches forming a narrow columnar habit of growth and is less than a tenth as wide as the tree is tall. The Italian Cypress has an extremely unique form that provides a classic distinction for Mediterranean themed landscapes, tall screens and framing accents.

Leylands are a popular privacy tree.  They grow very fast and thicken to create a solid wall.  It’s feathery texture is soft to the touch.  Leyland cypress trees stay green all year-round, giving complete privacy.

Filed Under: Trees

Growing Greens

September 12, 2014 by stephaniesuesansmith

Growing Greens by Byron Chitwood

Every year about this time, I write an article on greens.  This year is no different.  It is time to start preparing your garden soil and planting greens.  Begin by tilling the soil and removing all the sticks, stones and other debris.  Rake the level of the soil surface until it is level.  If you have a large garden plot, you might want to form 4-5 foot wide raised beds by ditching outside of the perimeter of the anticipated beds.  There are several advantages to these raised beds.  The most important one is that water will drain away from the vegetable beds.  Most greens as well as other vegetables like plenty of moisture but do not like wet and soggy ground.  Also, this width of bed makes it easy to plant rows and pull weeds without stepping on the bed surface and preventing compacting of the soil.  Most of these greens such as collards, broccoli, turnips, mustard, bok choy, kale and collards have very small seeds and do not need to be planted any deeper than ¼ inch with rows being about one foot apart.  Turnip seeds are usually broadcast into the area reserved for them.  However, they can also be planted in rows.  Chard and beets are planted with a dried portion of the beet or chard root.  After planting, hopefully just before a nice cool rain, the seeds should start to sprout within 7 to 10 days.

After the young plants are several inches tall, thin them out to a spacing of individual plants of about 4 to six inches.  Use a spacing of about a foot for broccoli.  There might be rows that have too many plants and some rows with large spaces.  Carefully dig some of the plants up and transplant to the gaps.  However, if you do not have enough plants for transplanting, reseed the gaps with some fresh seeds.  You can begin harvesting greens for the pot whenever they are about half grown.  Pull or snip a few leaves off the outside of the individual plants and within a few days, the remaining leaves will grow and fill in the blanks.  If you broadcast turnip seeds, they will probably need thinned out to make room for the roots to grow. Clean and cook the greens that were harvested during the thinning process.

Greens are one of the most nutritious vegetables that are grown in your garden.  Also, they are a tasty and welcome treat.  Some folks make a meal just comprised of greens and cornbread.  Cook the greens in a pan with some oil and canned chicken broth or meat with a little salt and throw in some chopped onions during the cooking process.

My favorite cornbread recipe is: mix a cup each of cornmeal and all purpose flour with a teaspoon of salt and 2 heaping teaspoons of baking powder.  The wet ingredients should be a cup of butter milk, two eggs, a quarter cup of oil and chopped dill, onions, celery and peppers, either hot or mild.  While all this mixing is going on, heat a cast iron skillet in a 425 degrees oven.  Mix all the dry and whipped up wet ingredients together.  Oil the cast iron skillet and pour all the batter into the skillet and cook at the same 425 degrees for about 30 minutes or until a toothpick inserted into the cornbread will come out relatively dry when pulled out.  Note that I did not add sugar to the cornbread ingredients.  If you want muffins, add sugar.

Remember all your friends without garden and shut-ins when harvesting greens.  Plant too many for your own consumption and you will have friends forever.

Filed Under: Uncategorized Tagged With: Vegetables

Greenhouse Gardening

September 6, 2014 by stephaniesuesansmith

Greenhouse Gardening by June Morgan

With the often extreme temperatures in our northeast region, even greenhouse gardening can be a challenge unless one is willing to pay large heating and air conditioning bills in order to keep optimal temperatures throughout the year. But good planning and reasonable expectations can help overcome the problems of utilizing what can be a considerable investment of money and time.

When planning a greenhouse, make watering easier with a centrally located raised spigot, a coiled hose with a mister attachment. Use wire shelving and have space for large containers of seed starting and potting mixtures, etc. A porous floor such as gravel is necessary. Gro-lights and warming lamps can be hung with S-hooks and chains from the ceiling to augment a heater with a thermostat. Having the greenhouse close to the house or with protected access is handy in inclement weather.

Fall begins the cool season when it is time to bring in small healthy annuals, non-hardy citrus and plumeria, etc. The greenhouse will have been washed down, spider webs and trash removed to prepare for planting.  Most plants will thrive at a minimum temperature of 50°. In this environment leafy greens will grow through the winter. Very early spring is the time to start seeds and take cuttings of annuals such as coleus for next summer’s garden. Some seeds such as peppers require extra heat in order to germinate so a thermometer and humidistat are useful tools. If the seeds are started too early, the new plants will suffer transplant shock, be root bound and stunted. Too late and the seedlings will not have enough roots to handle the transplant stress. Before planting outdoors, pick off the blooms and harden the plants gradually by giving them just enough water and fertilizer to keep them going.

When an uncooled greenhouse gets too hot, most plants and trees can go into the garden and some in a protected shady area. A few, such as aloe vera and cacti can stay put. Orchids can do well in the house under Gro-lights or in a window.  Summer in Texas is the time to temporarily abandon the greenhouse.

Most of all, the gardener should not think it mandatory to fill the greenhouse with everything possible. It is there for gardeners’ own needs and enjoyment on their terms.

Excellent books that go into much detail about building, measuring light, plant choices, etc. include GREENHOUSE GARDENER’S COMPANION by Shane Smith, THE COMPLETE BOOK OF THE GREENHOUSE by Ian G. Walls, and ORTHO’S ALL ABOUT  GREENHOUSES.

Filed Under: Gardening 101 Tagged With: Greenhouses,

  • « Go to Previous Page
  • Go to page 1
  • Go to page 2
  • Go to page 3
  • Go to page 4
  • Go to page 5
  • Go to page 6
  • Interim pages omitted …
  • Go to page 17
  • Go to Next Page »
Find Us on Facebook logo

Articles by Topic:

  • Composting
  • Earth-Kind
  • Entomology
  • Events
  • Flowers
  • Fruits and Nuts
  • Gardening 101
  • Herbs
  • History
  • Keyhole Gardens
  • Ornamentals
  • Plant Diseases
  • Recipes
  • Roses
  • Seeds
  • Square Foot Gardening
  • Trees
  • Turf
  • Vegetables
  • Water Conservation
  • Wildlife
  • Winter

Article Key Words

African Violets Asparagus Bag Worms, Bees Birds, Bluebonnets, Brown Patch, Butterflies, Composting Dragonflies eGardening with the Master Gardeners, Fall Tomatoes, Fire Ants, Fruit Trees Garlic, Gifts, Grapes, Grasshoppers, Greenhouses, Keyhole Gardens Late Fall Vegetables, Late Spring Gardening, Leeks Notable Texas Gardens, Onions, Poison Ivy, Poisonous Plants, Potatoes Propagation Pruning Trees, Rainwater Harvesting, Raised Beds Rose Hips Spider Mites, Spring Vegetable Gardening Squash Bugs, Summer Trees & Shrubs, Turf Grass, Valentines, Vegetables Watering Water Wise Gardening, Wildflowers, Winter
Texas A&M AgriLife Extension Service
Texas A&M University System Member
  • Compact with Texans
  • Privacy and Security
  • Accessibility Policy
  • State Link Policy
  • Statewide Search
  • Veterans Benefits
  • Military Families
  • Risk, Fraud & Misconduct Hotline
  • Texas Homeland Security
  • Texas Veterans Portal
  • Equal Opportunity
  • Open Records/Public Information