• Skip to primary navigation
  • Skip to main content
  • Skip to primary sidebar
  • Texas A&M Forest Service
  • Texas A&M Veterinary Medical Diagnostics Laboratory
  • Texas A&M AgriLife Extension Service
  • Texas A&M AgriLife Research
  • Texas A&M College of Agrculture and Life Sciences
Hunt County Master Gardeners
Hunt County Master GardenersTexas A&M AgriLife Extension Service
  • Menu
  • Home
  • Articles
  • About
    • Who We Are
    • Program Overview
    • FAQ
    • Contact
    • Master Gardener Emeritus
    • Heritage Garden
      • Animal Name Bed
      • Heritage Garden Plant Database
    • Hunt County Master Gardeners Shutterfly Photos
    • Junior Master Gardener Program
    • Outdoor Learning Center
  • Events
  • Links
    • Hunt County Extension Office
    • Texas AgriLife Extension Bookstore
    • Aggie Horticulture
    • Aggie Turf
    • Texas Master Gardener
    • Texas Master Gardener Association
    • Texas Master Gardener License Plates
  • Resources
    • Plants for East Texas
    • Vegetable Resources
    • Fruit & Nut Resources
    • Texas Plant Disease Diagnostic Lab
    • Soil, Water and Forage Testing Lab
    • Texas Superstar Plants
    • Earth-Kind Landscaping
    • Xeriscape
    • Insects in the City
    • USDA Plant Hardiness Map
  • CEUs
    • Log My Hours
    • Texas Master Gardener Association Events
    • Master Gardener Advanced Training
    • Earthkind Online Classes
    • Landscape Design Study Courses
    • American Horticultural Society Events
    • Texas Botanical Gardens and Arboreta

Bluebonnets

September 27, 2012 by stephaniesuesansmith

Bluebonnets by Pat Newell.

Bluebonnets have been loved since man first trod the vast prairies of Texas. Indians wove fascinating folk tales around them. The early-day Spanish priests gathered the seeds and grew them around their missions. It’s not only the state flower but also a kind of floral trademark almost as well known to outsiders as cowboy boots and the Stetson hat. The bluebonnet is to Texas what the shamrock is to Ireland.

September and October are the months for planting Bluebonnets. The seed actually germinates in fall, their tops remaining small and inconspicuous while developing the massive root system throughout the winter, to be able to provide us with a riot of spring color during April and May. Although heat is needed to germinate the seed, cool weather is needed to develop the bluebonnet’s root structure. Many people wait until they see bluebonnet plants blooming in the spring to begin planting. It’s too late to plant seeds in the spring. Fall is the optimum time for chemically-scarified seed to be planted.  Root systems established in early fall expand more and are able to produce a larger plant when top growth and bloom begins in the spring. Chemically-scarified seed should be planted no later than October 15 in North Texas (Dallas-Ft. Worth).

For years, wildflower lovers have planted bluebonnet seed and wondered what happened to the beautiful spring bloom which they expected. First of all, if common bluebonnet seed is used which has not been chemically treated (scarified), one doesn’t have much chance for success. The germination of non-scarified seed is sometimes less than 20 percent. To ensure rapid, high percentage germination, the bluebonnet seed has to be treated to remove inhibiting properties of the seed coat which otherwise prevent water uptake and the initiation of growth. This process of seed treatment is referred to as scarification.

Once scarified seed is in hand, you must first choose the ideal planting site. Ideal can be defined with one word, sunny. Bluebonnets will not perform well if grown in the shade or in an area which receives less than 8-10 hours of direct sunlight.

Bluebonnets will thrive in any soil as long as it is well drained, but soil that will not grow anything else will not grow bluebonnets either. When actually planting bluebonnet seed, forget the idea of just throwing or scattering the seed in the field!  Much bluebonnet seed has been wasted as bird feed using this scattering technique. The seed must come in contact with the dirt, while disturbing the ground as little as possible. So, to get bare dirt to show, a very light pass with a tiller, barely scratching the surface, or just a rake and a bit of elbow grease is enough to allow the seed to come in contact with the dirt. Shallow soil preparation will limit the disturbance of dormant week seed. Press the seed into the soil by walking or rolling over the newly planted area. Do not cover the seed any deeper than 1/16 of an inch

Keep in mind that during early growth, bluebonnets form ground-hugging rosettes. The whole plant may not be over several inches tall but the leaves may cover an area the size of a dinner plate. This is a natural condition and regardless of how much one waters or fertilizes, the plant will not grow rapidly until the warmth of spring initiates flower stalks. No additional fertilizer needs to be added to fields of bluebonnets; in fact over fertilization causes large plants with few blooms. Remember, bluebonnets are actually very drought tolerant and as such is very susceptible to death from overwatering.  Once plants become established (two or three weeks after planting), they are drought tolerant and one of Texas’ toughest natives, and certainly the logiest of wildflowers.

A personal note on seed choice. I planted scarified seed properly for a number of years, with no success whatsoever. I had all but given up when I discovered a vast area of blooms in a back pasture within a mile of our house. After obtaining permission, I gathered a large bag of drying seed pods.  After collecting the seed, without any treatment other than having collected the seed nearby, I now have a spectacular show every spring.
Filed Under: Flowers Tagged With: Bluebonnets,

Bluebonnets

September 20, 2011 by stephaniesuesansmith

Bluebonnets by Madeline Sullivan

Everyone loves bluebonnets because they are the Texas state flower and they are beautiful. There are six species of Lupinus in Texas known as bluebonnets, but only two species are endemic to Texas, the Texas bluebonnet and the sandyland bluebonnet. These are the ones that the highway department plants on many roadways for erosion-control and roadside beautification programs. The sandyland bluebonnet was adopted as the state flower in 1901, but because it was not as showy as the Texas bluebonnet, and popular opinion called for the other four species occurring naturally in Texas to be the state flower, in 1971, the decision was made to make all six of the lupines the state flower. Here in Hunt County only the Texas bluebonnet and the sandyland bluebonnet will grow with success.

Let’s make a little preparation before putting your bluebonnet seeds in the ground.  Bluebonnets do not like heavy grasses or wet feet. Select an area that is open to the sun, not too full of heavy grasses and not in a low area that stands in water when it rains. Bluebonnets should not be sown in an area with winter grasses such as fescue or any type of clover. The grasses and trifoliums will be too aggressive to let the bluebonnet seeds establish. Also, though, do not sow bluebonnet seeds in a bald area on which nothing has ever grown. It is certain that bluebonnets will not grow there either.

If the area you choose is full of grasses and weeds, use a herbicide to kill them in mid-September. Two weeks later check the area, as a second application of herbicide may be necessary.  Let the area lay fallow for at least 14 days. After that time, rake-up all the dead debris and make the area as clean as possible before tilling. When you till (a rake will be good), it must be shallow, not more than 1 inch deep. It works well to till in one direction and then till perpendicular to the first tilling. After tilling, rake the area to make it clean and smooth.

At the end of September to the middle of October, you are ready to plant. As you start to sow, combine the seed with a carrier such as masonry sand, perlite, or potting soil–recommendation being a minimum of 4 parts inert material to 1 part seeds. This is to increase volume and aid in even distribution over the site. Broadcast half of your seeds uniformly over the prepared area. Sow the remaining seeds in a direction perpendicular to the initial sowing.  One of the main problems of a scattered showing is not using enough seeds. So, use plenty of seeds to get a good stand of bluebonnets in the spring. After you finish sowing, press the seed into the soil by walking or rolling the newly planted area. Do not cover the seeds any deeper than 1/8 inch. Some seeds will remain visible. Keep the area moist until the seedlings are well established.

Next spring, you can enjoy your pretty bluebonnets.

Filed Under: Flowers Tagged With: Bluebonnets,, Wildflowers,

The Wild Asters of Hunt County

August 24, 2011 by stephaniesuesansmith

The Wild Asters of Hunt County by Madeline Sullivan

There are four types of wild asters in Hunt County:  the heath aster, the Texas aster, the annual aster, and the meadow aster. They come up in the spring and have their leaves and stalks all summer, looking like a small hedge row along the fences and against the house.

If you do not know how the asters look in the spring or summer, it is very easy to mow them down since they closely resemble weeds.  In August, however, their buds began to grow and by the end of August and early September they began to flower.

The heath aster and the Texas aster have white ray flowers and yellow disk flowers in the center of the bloom.  The heath aster has an abundance of small flowers all up and down the stem.  When grouped together, they make a spectacular show of the numerous small white flowers and the medium green leaves below that grow all the way to the ground.

The Texas aster has a larger flower than the heath aster and is some taller.  It likes shady places under tall trees with loamy, rich, well-drained clay soils, and when other flowers are at the end of their season, the Texas aster blooms are still alive and inviting around the yard area.

The meadow aster is large and showy, with purple or violet flower heads and yellow center disk flowers.

The annual aster, which has ray flowers that are white to lavender or purplish, with disk flowers of yellow, is not particularly showy as an individual specimen plant.  It is branched and has only a few flowers on each stem. When this plant is in mass, though, it is quite noticeable.  This aster is common in lawns and will bloom profusely even when mowed short.

Any or all of these four asters are definitely a desirable addition to your garden and could be planted with goldenrod, mistflower (blue boneset), and gay feather to make a spectacular show in the fall wildflower garden.

Filed Under: Flowers Tagged With: Asters,, Wildflowers,

The Animal Name Bed

May 17, 2011 by stephaniesuesansmith

The Animal Name Bed by Marguerite Callahan.

Bear’s Breeches, Turtle’s Head, or Toad Lilly, sound familiar?  Probably not.  These are just a few of the animal name plants you will find at the Animal Name bed in the Heritage Garden in Greenville, Texas. The idea for this garden came from my garden in Sammamish, Washington where after eighteen years it was developed into a collection of different animal name plants. When a bed became available, the beginning of the animal name garden was born.

When designing your garden remember to take into account the soil Ph, (soil test recommended), amount of sun and shade, size of your garden, and climate of your area (average rainfall, high and low temperature). Studying the site and understanding the basics of gardening will help you achieve your design goals and grow healthy flowers.  Garden design includes paying attention to spacing as well as to each plant’s cultural needs. Correct spacing allows enough room between individual plants for each one to grow and mature to its full potential. Amend the soil with 3 inches of organic matter (e.g. compost) and 3 inches of expanded shale. Regardless of soil type, plants need to be protected year-round with a layer of mulch (e.g. cypress bark) 3-4 inches thick. It is also very important to provide drip irrigation for the plants especially in the hot Texas sun during the summer.

To attract butterflies be sure to include both host and nectar plants. Nectar-producing plants will attract butterflies to your garden. One of the most common mistakes in butterfly gardening is planting only one nectar source. Adult butterflies have a very short lifespan. Planting a variety of nectar sources will encourage more butterflies to visit the garden.  Butterflies are guided to the nectar source by colors and patterns. Choose flowers with bright colors like pink, orange, yellow, and purple. An aromatic garden will serve as the butterfly’s main attraction. Examples are Tickseed, Butterfly pincushion flower, beebalm, and hummingbird mint.

Food-source plants for the caterpillar are quite specific to species as well as region. In the butterfly’s short life, the female will be looking for the specific larval food plants on which she must lay her eggs.  Planting host plants gives butterflies a place to lay their eggs, which will successfully hatch and result in butterflies that will continue to visit the garden. Examples would be Snapdragons and Zebra Mallow.

Here are some of the plants that can be found at different times in the Heritage Garden: Bat Plant, Bear’s Breeches, Bee Balm Fantasy, Bee Balm Jacob Kline, Bellflower Pink Octopus, Butterfly Blue Pincushion Flower, Catmint, Crimson Butterflies Guara, Dragon’s Blood Sedum, Dwarf Monkey Grass, Elephant Ear, Foxglove, Giant Hummingbird Mint, Hens & Chickens, Hummingbird Mint, Lamb’s Ears, Lion’s Ear, Lion’s Head Daffodil, Minnow Daffodil, Mouse Ear Coreopsis, Oxalis ‘Pink carpet’, Pink Turtlehead, Quail Daffodil, Red Fox Speedwell Veronica, Salmon Star Lily, Scabiosa “Misty Butterflies”, Snapdragon, Swallowtail Columbine, Tickseed, Tiger Lilies, Toad Lily, Wormwood, Yellow Bird Lily, Zebra Mallow.  Please come by during the growing season to enjoy them, and make plans to join the Hunt County Master Gardeners for the annual Garden Tour on May 30.

Filed Under: Flowers Tagged With: Animal Name Bed,

Pruning Roses

March 11, 2011 by stephaniesuesansmith

Pruning Roses by PJ LaRue Smith

What is the purpose behind pruning roses?  To improve the health and vigor of the bush by removing dead, diseased, damaged, or unproductive canes and opening the bush up to allow for air flow in order to assist in natural disease prevention.  Understanding these two primary purposes can act as a guide in the technical part of pruning roses.

Some exceptions to pruning a rose bush need to be mentioned before proceeding.  If the bush only blooms on old wood (i.e. blooms once a year in the spring or summer) then it is NOT to be pruned until AFTER it blooms).  Healthy wood (a creamy white color on the inside) on repeat blooming climbers should be pruned lightly.  Old garden roses (OGRs) and Shrub roses should be pruned lightly as well.

Before making the first cut on any bush, assemble the necessary equipment.  Standard rose pruning equipment includes, but is not limited to:  (a) sharp pair of BY-PASS pruners (not the anvil type that tends to crush the canes); (b) solid leather thorn-proof gloves (no part of which should be cloth); (c) either a pruning saw, or sharp pair of long-handled, BY-PASS loppers (to trim away large diameter canes); (d)  trash can for debris (both what has been cut off and what may be lying below the plant); (e) good whet stone to keep the pruners/loppers sharp (dull blades damage canes and tend to be a hazard for the operator); (f) appropriate footwear for working in the garden (sandals and flip-flops don’t protect from thorns, ants, or the accidentally dropped pair of pruners); (g) long-sleeved shirt and jeans (did I mention roses have thorns?); and (h) stocked first-aid kit (complete with tweezers for picking out the “thorn in the flesh”).

“How to cut” requires a little rose anatomy lesson and remembering the second purpose listed above.  In order to “open up  the bush” one has to cut above an outward facing bud eye.  Since there are likely no leaves left, this would be where the leaves were attached.  This looks like a little smile with a nose above it.  New growth will originate from the “nose” of the bud eye and grow in the direction it is pointing.  If the bud eye faces the inside of the bush, then that is the direction it will grow.  Cutting to an inside facing bud eye will close up the bush instead of opening it up.  The cut should be approximately 1/4” above the bud eye at a 45° angle with the peak above the bud eye.

Climate determines the best time to prune roses in the spring.  For the north Hunt County area, this would be the end of the first week in March, for the southern half of the county, around the first of March.  Understand that these are general dates, and if you haven’t yet pruned the garden’s roses this spring, the window is still open to do so.  Be sure to remove and dispose of (not in the compost pile) all trimmed material and any leaves or rose pieces on the ground as they can harbor disease and insect pests.

At the time of pruning, fertilize the roses lightly (per soil testing), add more mulch as needed, and begin the year’s spray program for disease if you are so inclined.  The fungicides that are available to the home gardener are preventative, not curative, and must be applied prior to the outbreak of disease.  If spraying is begun at pruning time, and old diseased plant parts are removed from around the bushes, the incidence of disease can be significantly lowered.

PJ LaRue Smith is a master gardener in Hunt County.

Filed Under: Flowers, Roses Tagged With: Pruning,

Daffodils Are Blooming in the Garden

March 7, 2011 by stephaniesuesansmith

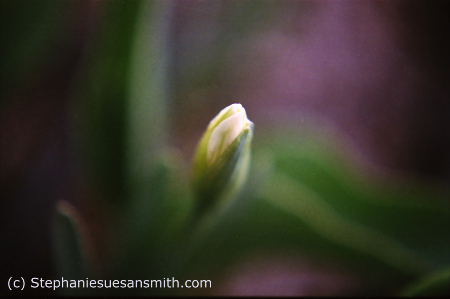
The daffodils have started to bloom in the garden.  This photograph was taken last week and the bud should be out by now.  Come by and see the colors of spring!

emerging daffodil bud

Filed Under: Flowers

  • « Go to Previous Page
  • Go to page 1
  • Go to page 2
  • Go to page 3
Find Us on Facebook logo

Articles by Topic:

  • Composting
  • Earth-Kind
  • Entomology
  • Events
  • Flowers
  • Fruits and Nuts
  • Gardening 101
  • Herbs
  • History
  • Keyhole Gardens
  • Ornamentals
  • Plant Diseases
  • Recipes
  • Roses
  • Seeds
  • Square Foot Gardening
  • Trees
  • Turf
  • Vegetables
  • Water Conservation
  • Wildlife
  • Winter

Article Key Words

African Violets Asparagus Bag Worms, Bees Birds, Bluebonnets, Brown Patch, Butterflies, Composting Dragonflies eGardening with the Master Gardeners, Fall Tomatoes, Fire Ants, Fruit Trees Garlic, Gifts, Grapes, Grasshoppers, Greenhouses, Keyhole Gardens Late Fall Vegetables, Late Spring Gardening, Leeks Notable Texas Gardens, Onions, Poison Ivy, Poisonous Plants, Potatoes Propagation Pruning Trees, Rainwater Harvesting, Raised Beds Rose Hips Spider Mites, Spring Vegetable Gardening Squash Bugs, Summer Trees & Shrubs, Turf Grass, Valentines, Vegetables Watering Water Wise Gardening, Wildflowers, Winter
Texas A&M AgriLife Extension Service
Texas A&M University System Member
  • Compact with Texans
  • Privacy and Security
  • Accessibility Policy
  • State Link Policy
  • Statewide Search
  • Veterans Benefits
  • Military Families
  • Risk, Fraud & Misconduct Hotline
  • Texas Homeland Security
  • Texas Veterans Portal
  • Equal Opportunity
  • Open Records/Public Information